JEEP - 3rd STEP - THE INTERIOR

TRAVELcandies On Tour - The Interior Of Our JEEP Wrangler JK Unlimited Sahara. Additional Sleeping Berth, Gas, Flowing Water, Heat Insulation.
The JEEP Wrangler JK Unlimited (long version) has limited space and the roll bar doesn't make it any better. Another problem with the JEEP is, that its maximum load is just a joke, so we always had to keep the overall weight of the interior in mind.
Our demands were pretty high. We wanted to have flowing water, an installed gas bottle, as well as a small sleeping berth for emergency cases like heavy rain, storm or whatever and as much as possible storage space.
Heat Insulation With Armaflex by Armacell
In the very first beginning I thought about heat insulation. Even if the JK is equipped with an air condition, we already knew, that it could pretty much heaten up inside.
With our Volkswagen T4, we already had some very bad experience.
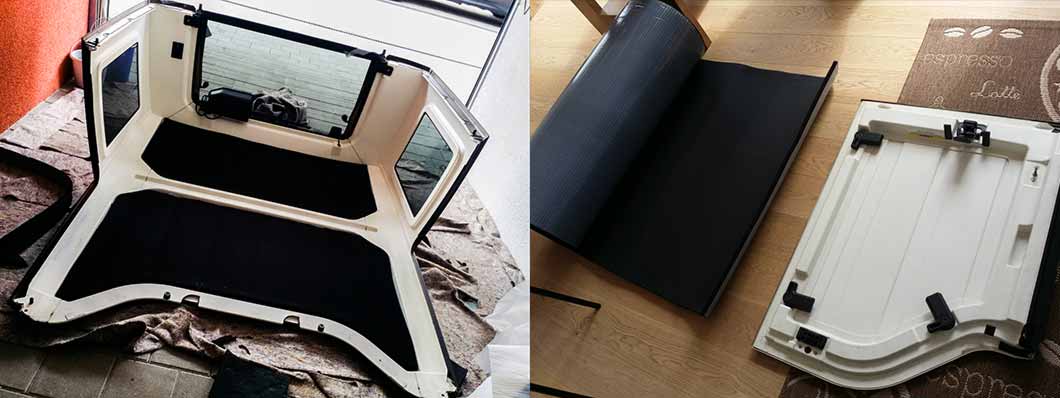
For this case, I've ordered a few square meters of Armaflex from Armacell. This highly effective insulation material should do a perfect job.
I disassembled all the hardtops, cleaned everything with Isopropanol, tailored the different plates and sticked them onto the hardtops. For the finish I took some cover fabric (which you might know from loudspeakers) and glued it onto the Armaflex for the final look.
The adhesive side of Armaflex is very, very strong, so please keep in mind, that you never will get rid off it 😉

JEEP-Wrangler Interior - Heat Insulation
It's All About Storage Space And Weight
At first I cored the in-cabin and removed the back bench and the carpet. The back bench weighs 13 KG and as we wouldn't need it, we've got much more space and saved weight.
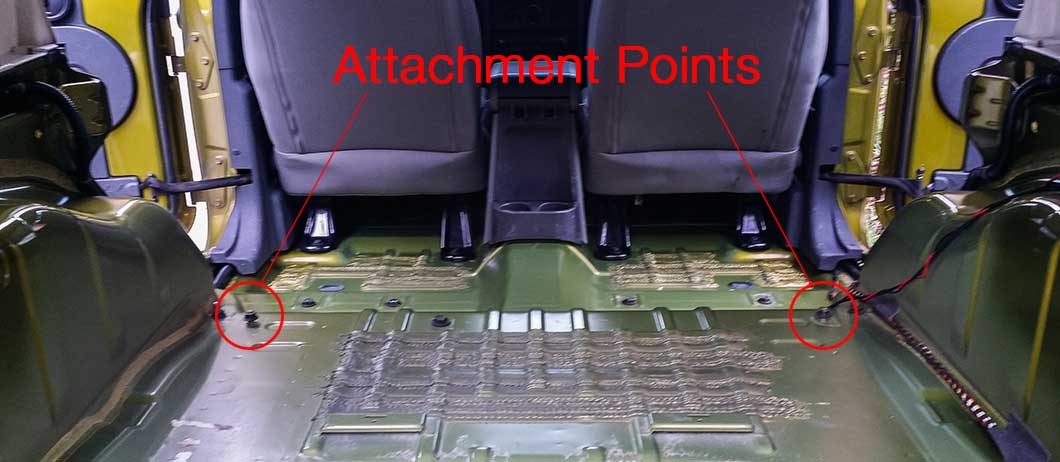
For getting an overview for the attachment points, I removed the carpet and then sealed the floor with Fertan Wax cavity sealing.

Room For the Interior - The Screws (Red Circle) Are The Attachment Points
Next step has been to measure the space and to visualize the different boxes on my 3D workstation. I came to the conclusion, that I needed ca. 10 square meters of woodsheets.
Visualization Of The Interior In 3D
Then I thought about the material in terms of thickness and kind of wood. Very often I saw interiors made of 15mm chipboard. I searched for a software to calculate the weight and got 131 KG for the round about 10 square meters. WAY TOO MUCH.
I calculated for several materials, but the weights always have been much too high. Except for plywood. Its weight is just 36 KG in 5mm thickness, which is light enough. I didn't know, if it would be stable enough, so I've took the risk and tried it.
For saving more weight, I drilled holes into the sheets, in hope the final boxes wouldn't break.
This way, I built 5 boxes, which stick together with screws and wood glue.
Each Box Is Made Of Plywood. The Sheets Stick Together With Wood Glue And Screws.
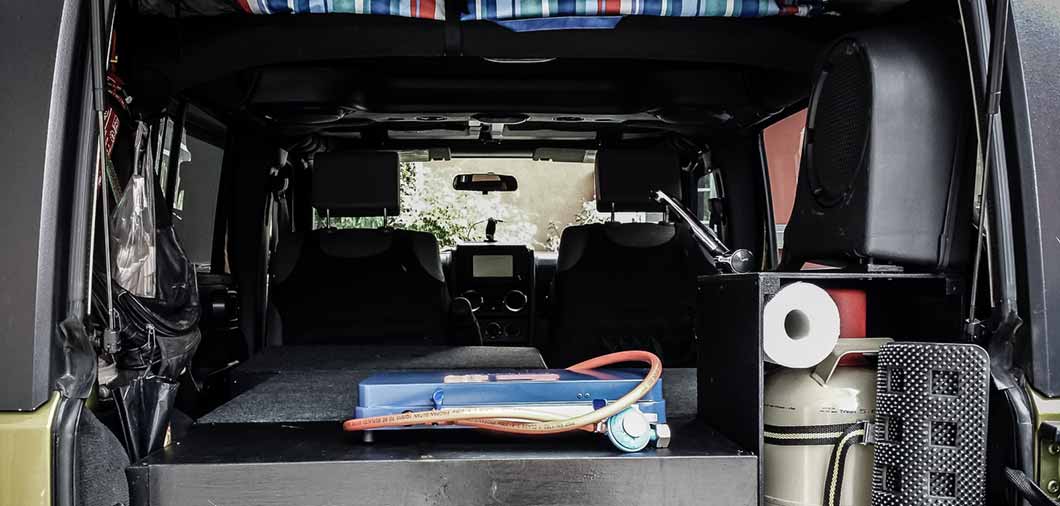
Five Boxes, 27 KG - Well Done
Now I had the following boxes with an overall weight of 27 KG:
. One box for the 30ltr. water canister,
. Dishes and cuttlery,
. 6 KG gas bottle,
. One for my "power bank",
. Stoarge for toolbox, spare parts, fluids etc
The system is kept together with five M12 screws, can be easily disassembled and is fixated to the screws of the back bench.
On top of these boxes, there can be placed 3 matrasses for building a small sleeping berth, which is 192cm x 100cm. Fortunately it's much more comfortable than I thought and we already slept 3 days in a row on it...nice one 🙂
The boxes itself got a water resistant paint finish, furthermore I've upholstered them with a felt carpet.
I've also integrated a Shureflow Junior waterpump, which is connected to the water canister. Behind the passenger seat, I've integrated a Dometic Waeco Mobicool Q40 cooling box, which cools down our food up to 20°C below environmental temperature.
Five Boxes Of About 27 KG And Lots Of Storage Space
Tailgate Table - Cheap And Reliable
The main cooking system is based on a two-burner hob from Campingaz, which should be placed on a small table, which I've built for the tailgate.
Whereas a lot of systems will be offered for a huge amount of money, I rather bought a cheap windowsill (8€) and a pair of hinges (15€ each).
It took me round about 2hrs, until the system got finished and an expense of 38€ instead of 10 times more.
Campinggaz "Base" - Two-Burner Hob On A Cheap Tailgate Table
Testing Offroad
We really hadn't any clue, if the system would work or if it would break down on our very first journey. Therefore I took the Jeep to the Offroad Park "Langenaltheim" for an 8h testdrive. It's a small offroad testtrack, perfect for driving through some holes or over steep obstacles. I tested the behaviour while the body twists and shears, but my expectations have been excelled. Not even a creaking came from the back, everything worked perfect, nothing broke, no screw became loose.
The overall costs for the interior were about 400€, incl. wood, tools, screws, nails, glue, carpets.
At the moment, when writing this article, the Interior is 1.5 years old, traveled 25.000 KM already and is still instact.
Offroad Park Langenaltheim - Testing The New Interior


Great write up. I am looking to make something similar for my Jeep. Great idea cutting the holes to reduce weight.
hey Aaron, thanks a lot and good luck with your JEEP. Yeah, the holes saved a good weight and won’t do anything on the stability. BUT, as for the fact, that the boxes aren’t fully closed anymore, there will always be dust inside the boxes.
Not so much when you’re travling on the roads, but much more, if you’re overlanding through deserts.